Konami’s Diorama Studio software is a remarkable program that puts a virtual action figure (based on designs from the Busou Shinki toyline) on your PC. It’s a free program but the fact it’s in Japanese may intimidate non-Japanese fans who are keen to try it out.
In previous guides, I showed you how to download and install Diorama Studio, display Japanese text on a non-Japanese edition of Windows XP, create a Konami ID and select and pose a CG model in the Diorama Studio Model Editor.
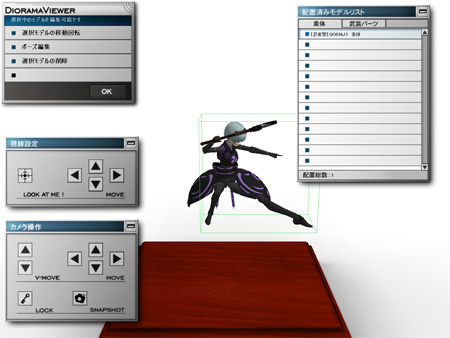
In the first part of the Diorama Studio Diorama Viewer guide, I showed you how to select a diorama background and load a posed model into the diorama background. I left you at this screen:
In this guide, I’m going to show you how to position the model in the diorama background and save your diorama data.
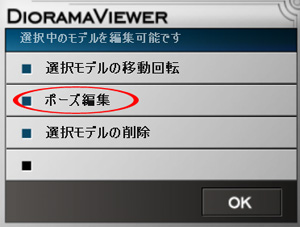
This is the main menu panel for this screen:
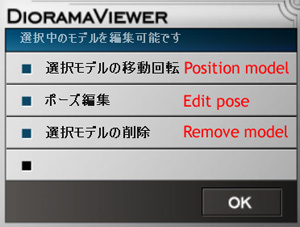
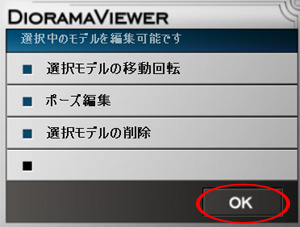
The Position Model option lets you position the CG model in the diorama background.
The Edit Pose option allows you edit the model’s pose. It’s highly likely you will have to make minor adjustments to the pose when you place the model in the diorama background.
The Remove Model option removes the selected model from the diorama background. (You will be asked for confirmation; click on “OK” to remove the model from the diorama background.)
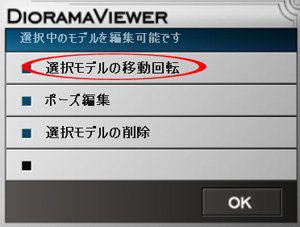
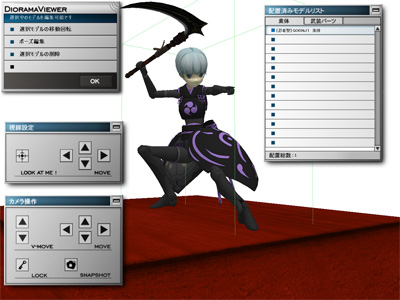
Select the Position Model option by clicking on the option circled in red below:
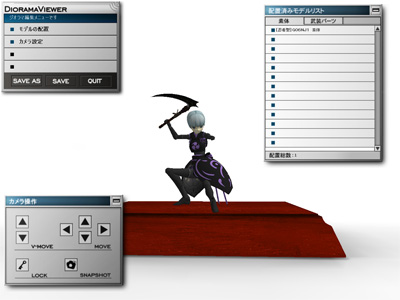
You will now see this screen:
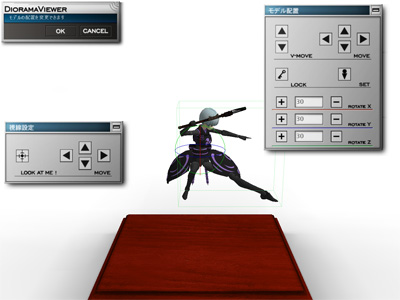
Let’s take a look at the panels in this screen.
The Eye panel, identical to the one found in the Model Editor, positions the eyes.
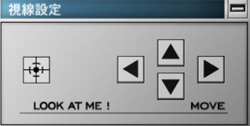
The four “Move” buttons move the eyes up, down, left or right while the “Look at me!” button automatically positions the eyes so that they look at the centre of the screen.
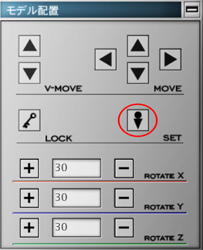
The Position Model panel lets you position the selected CG model in the diorama background.
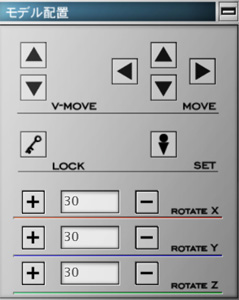
The “V-Move” buttons move the selected model up or down while the four “Move” buttons move the model forward, backward, left or right.
The “Lock” button locks the model in place. Clicking on the four “Move” buttons with the “Lock” button activated will rotate the camera around the CG model.
The “+” and “-” buttons rotate the model in place in three separate axes. The default is 30 degrees of rotation but you can change that amount by keying in a numeric value between 1 and 90.
As you move the model about the diorama background, you will notice the diorama background has a boundaries which reveal themselves by flashing slowly in red.
You may not position the model or the camera outside the boundaries.
If the panels are obscuring your view of the background or the model, hit the Shift+F1 keyboard command to hide all the panels. Hitting Shift+F1 again will display the panels again.
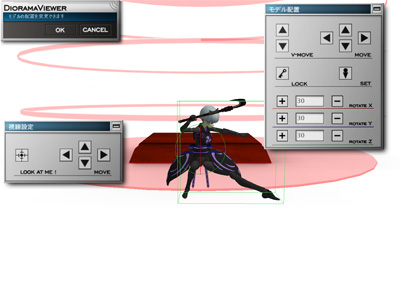
Once you’ve positioned the model in the background to your satisfaction, click on the “Set” button to return to the Diorama Viewer main menu.
As you can see, I’ve positioned the model so that it’s placed right on the pedestal.
If you need to make minor adjustments to the model’s pose, click on the Edit Pose option (circled in red):
You will see this screen:
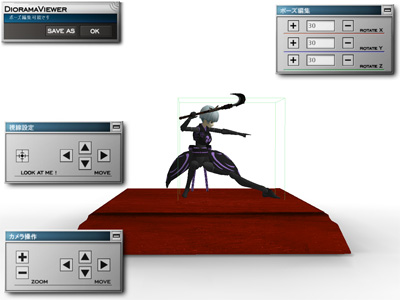
The options are identical to the Model Editor Pose Edit screen so refer to the earlier guide if you need help posing the CG model. Once you’re happy with the pose, Click on “OK” to go back to the previous screen or “Save As” to save your pose changes.
Once you’re satisfied with model’s pose and placement in the diorama background, click on the “OK” button on the main menu panel.
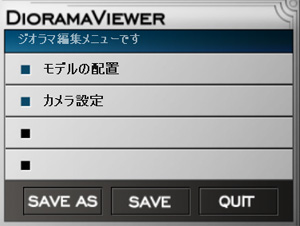
You will now see this screen:
It’s time to save the diorama. To do this, click on “Save As”:
You should see this panel:
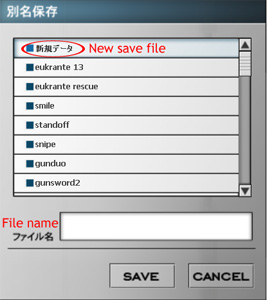
Make sure the option to save in a new file slot is highlighted in pale blue then key in a filename. The filename field takes a maximum of 16 alphanumeric characters and you may use English text. Once you’ve named your file, click on the “Save” button.
In part 3 of the Diorama Studio Diorama Viewer guide, I’ll show how you to load a saved diorama, position the camera and take a screenshot.
