Konami’s Diorama Studio software is a remarkable program that puts a virtual action figure (based on designs from the Busou Shinki toyline) on your PC. It’s a free program but the fact it’s in Japanese may intimidate non-Japanese fans who are keen to try it out.
In previous guides, I showed you how to download and install Diorama Studio, display Japanese text on a non-Japanese edition of Windows XP, create a Konami ID and select and pose a CG model in the Diorama Studio Model Editor.
In part 1 of the Diorama Studio Diorama Viewer guide, I showed you how to select a diorama background and load a posed model and in part 2, I showed how to position the model in the diorama background and save your diorama data.
In this guide, I’ll show how you to load a saved diorama, position the camera and take a screenshot.
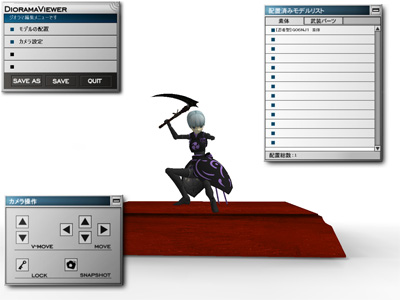
This is the main screen of Diorama Studio.
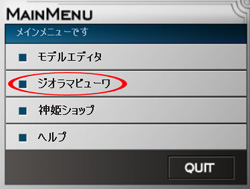
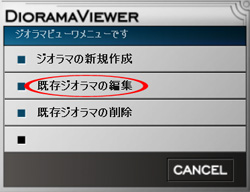
Click on the Diorama Viewer option (circled in red below) in the Main Menu to go to the Diorama Viewer.
You should see this Diorama Viewer screen now:
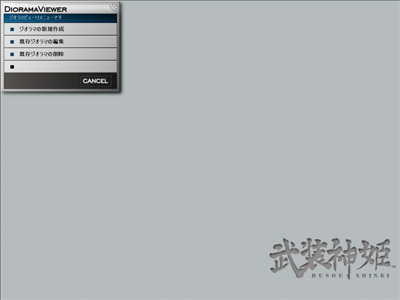
The options available in the menu for this screen are as follows:
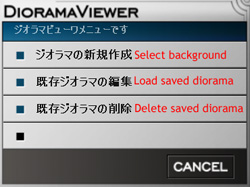
To load a previously saved diorama, select the option circled in red below:
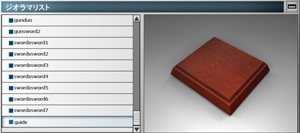
You will now be presented with a list of previously saved dioramas:
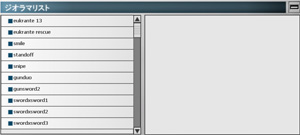
When you click on an item in the list, it will be highlighted in pale blue and a preview of the diorama background will be shown the preview window.
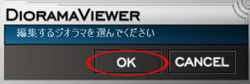
Click on the “OK” (circled in red) button to select your previously saved diorama:
You will now see this screen:
It’s now time to take a screenshot of your diorama. To do so, click on the “Snapshot” button on the camera panel:
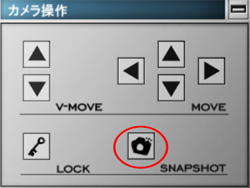
You should hear a sound effect of a camera shutter clicking as the screenshot is taken.
Screenshots are stored in JPG format in the screenshot subfolder of your Busou Shinki application folder. The files are automatically named according to the date. Note that the ShinkiNet logo and a copyright notice are automatically included with every screenshot.
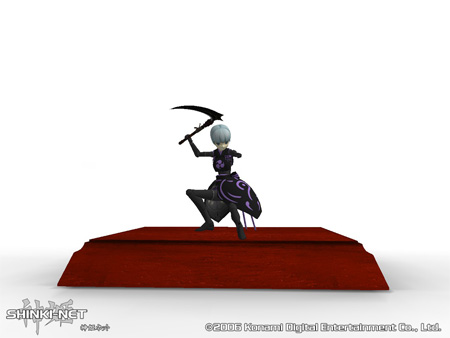
The screenshot above looks a little vanilla. You can move the camera around and zoom in or out to get a better shot.
You can manipulate the camera in three ways: with the camera panel, the mouse or keyboard commands.
To move the camera about with the camera panel, simply click on the buttons.
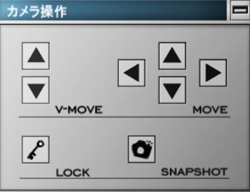
The four “Move” buttons move the camera left or right or zoom in or out. The two “V-Move” buttons move the camera up or down. The “Lock” button locks the camera in place. Clicking on the “Move” buttons with the “Lock” active will rotate the camera up, down, left or right.
To move the camera with the mouse, you will have to press a mouse button while moving the mouse. To zoom in or out, click the left mouse button and move the mouse up or down. To move the camera left or right, click the left mouse button and move the mouse left or right. To rotate the camera, press the right mouse button while moving the mouse up, down, left or right.
You may also use the cursor keys, Shift+(cursor key) and CTRL+(cursor key) commands to move the camera around.
You can reset the camera to its original position by hitting the Home key. If you’d like to set a new default position for the camera, use the Shift+Home keyboard command.
If the panels are obscuring your view of the model or background, use the Shift+F1 command to hide all the panels, If you’d like to see the panels again, hit the Shift+F1 command again. You may also use the F1, F2, F3 and F4 keys to hide/display individual panels in this screen.
