Konami’s Diorama Studio software is a remarkable program that puts a virtual action figure (based on designs from the Busou Shinki toyline) on your PC. The program is in Japanese but don’t let that put you off trying it.
In previous guides, I showed you how to download and install Diorama Studio, display Japanese text on a non-Japanese edition of Windows XP, create a Konami ID and select and pose a CG model in the Diorama Studio Model Editor.
In this guide, I’m going to show you how to create a simple diorama using the Diorama Studio Diorama Viewer.
This is the main screen of Diorama Studio.
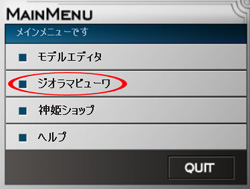
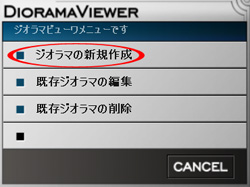
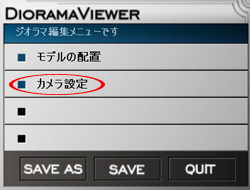
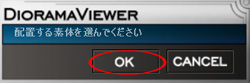
Click on the Diorama Viewer option (circled in red below) in the Main Menu to go to the Diorama Viewer.
You should see this Diorama Viewer screen now:
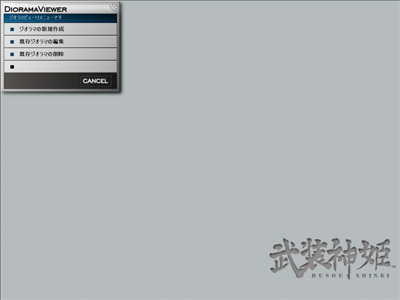
Let’s take a closer look at the options available in the menu for this screen:
We’re now going to create a new diorama using the model and the pose we saved in the previous guide.
Choosing a background
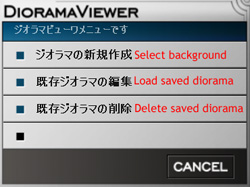
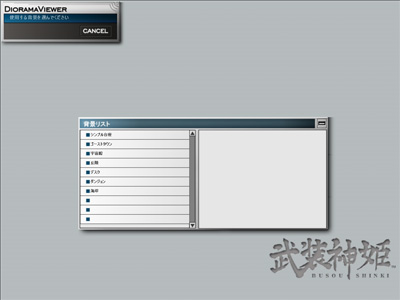
The first step is to choose a diorama background. Click on the option circled in red below:
You should now see this screen:
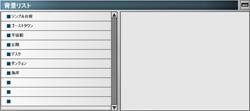
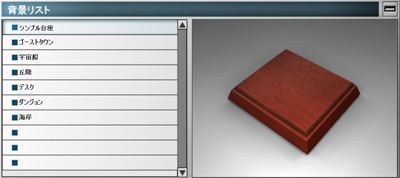
The background list (seen below) currently has seven different 3D diorama backgrounds:
Click on the simple background (circled in red below):
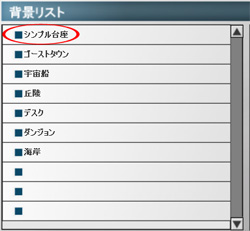
You will now see a preview of the simple background in the background list:
Now click on the “OK” button to select this diorama background:
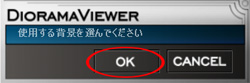
Simple background
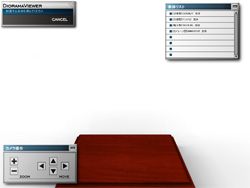
You should see this screen now:
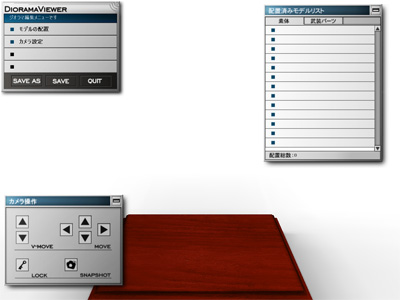
The Camera panel (seen below) should be familiar by now but there are two new buttons on it.
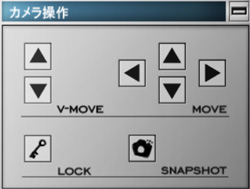
You can use the direction buttons to move the camera around the diorama background. Since the simple background lives up to its name, there’s not much to see.
You may also use the cursor keys on your keyboard to move the camera forward, backward, left and right. Try the Shift+cursor key and Control+cursor key commands to move the camera around.
Pressing Home on the keyboard will return the camera to its original position. The Shift+Home key command temporarily sets a new default position for the camera which you can return to by hitting the Home key. This is useful when you’re experimenting with different camera angles to take that perfect screenshot.
The Lock button locks the virtual camera in position. Clicking on the direction buttons on the Camera panel when the Lock button is active will cause the virtual camera to rotate while staying locked in position.
The Snapshot button takes a screenshot without the panels. Screenshots are saved in the screenshot subfolder of your Busou Shinki installation folder. Individual screenshots taken at the highest resolution and quality are between 50KB to 500KB in size.
Before taking a screenshot, we should configure the screenshot settings. To do this, select the Camera settings option circled in red below:
The Screenshot settings options (see below) determines the resolution and quality of the screenshots taken with Diorama Studio.
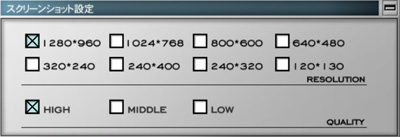
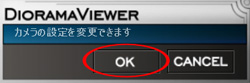
Once you clicked on a resolution and option, click on the “OK” button to accept your changes or “Cancel” to go back to the previous screen without saving.
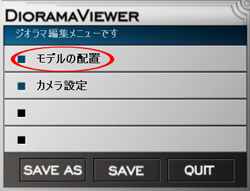
Selecting a model
Now that we’ve set up the background, it’s to put a CG model in it. This takes two steps: selecting a model and then selecting a saved pose associated with that model.
To do this, first click on the option circled in red below:
You should now see this:
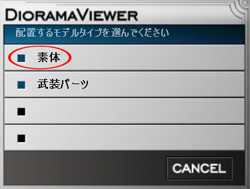
Click on option circled in red to select a body type.
You will now see this screen:
If you haven’t added any Busou Shinki access codes, you should only see one option in the Body list. Click on the option circled in red to select Ninja Fubuki.
You should see this screen as the Ninja Fubuki CG model is previewed:
Click on “OK” to select the Ninja Fubuki CG model.
Selecting a pose
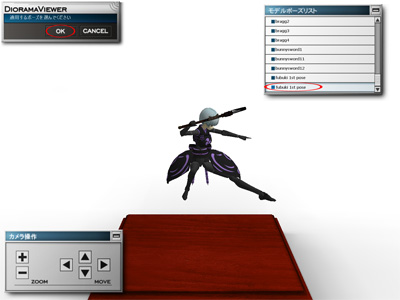
You should now see this screen:

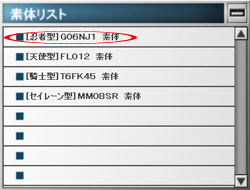
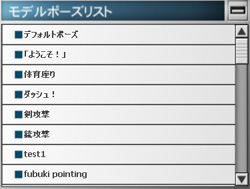
The Model Pose List panel (seen below) lists the standard default poses as well as any custom saved poses of your own.
Select a pose from the Model Pose List panel to see it previewed then click on the OK button to choose it.
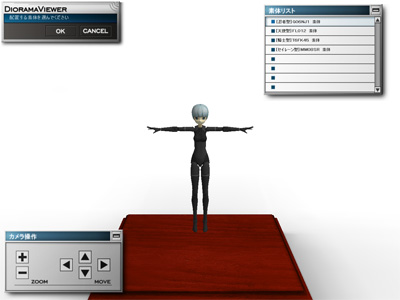
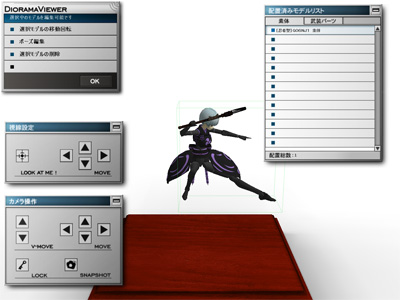
You should now see this screen:
In second part of the Diorama Studio Diorama Viewer guide, I’ll show you how to position the model in the diorama background and save your diorama.
